
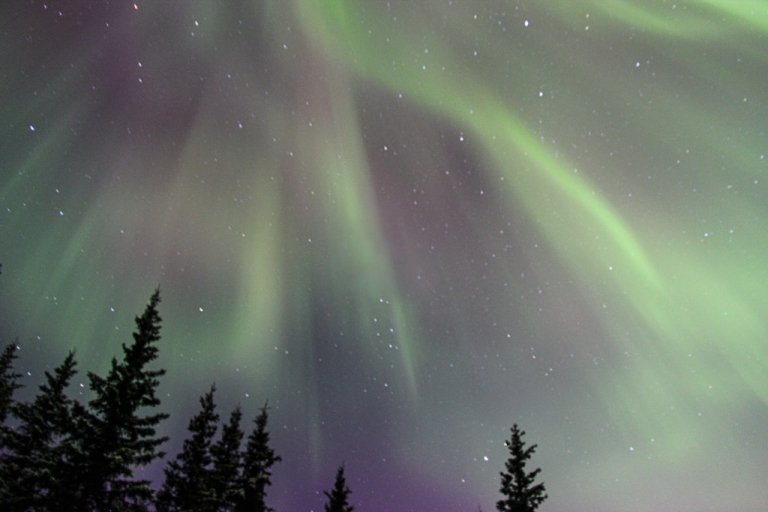
How To Edit Northern Lights Photos
Updated March 2024, How to Edit Northern Lights Photos was originally written in July 2017
This is the final installment of my ‘How to Shoot the Aurora’ series, where I explain what is aurora, what gear you need to capture the aurora, how to shoot it, and how to edit your aurora photos. This post covers how to edit your photos of the northern lights.
Are you planning a trip to the high latitudes (or super low lats)? This guide series will give you all the tips, tricks and a step-by-step list of how to shoot the aurora on you’re very own and edit aurora photos afterward.
Want to catch up on the first part of this ‘How to Shoot the Aurora‘ series? Check out ‘What is Aurora?‘. Not sure what gear you should be using? Read ‘Aurora Photography Gear‘ to find out the must-haves and check out my last post: How to Shoot the Aurora.
Looking For More Info To Help You See The Northern Lights? Check Out 9 Tips For Viewing The Aurora
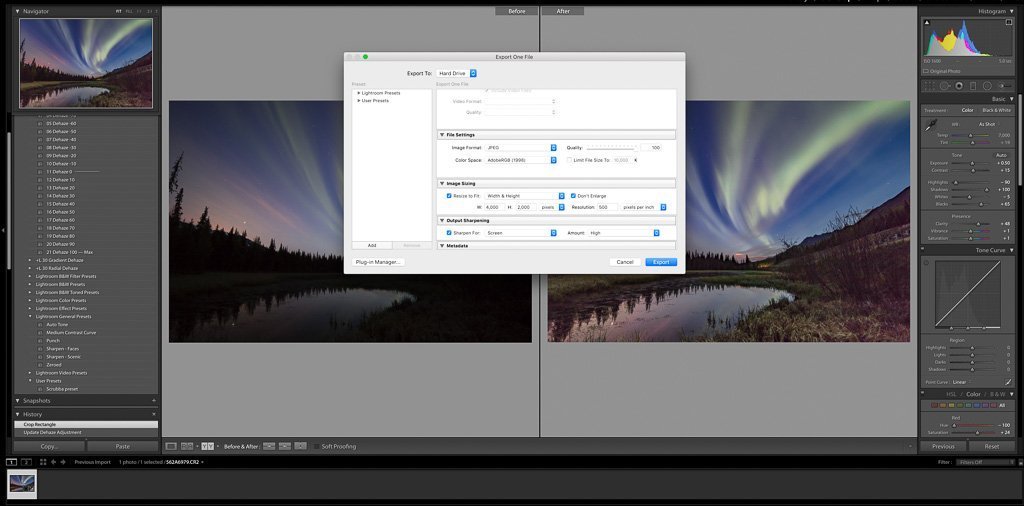
The rest of this guide will explain how to edit northern lights photos. This will require the use of Adobe Lightroom to process your images.
Of course, these steps are suggestions and can be loosely applied to your tastes. Not everyone likes the same editing. I don’t really enjoy editing photos and try to keep my editing minimal.
How To Edit Autora Photos
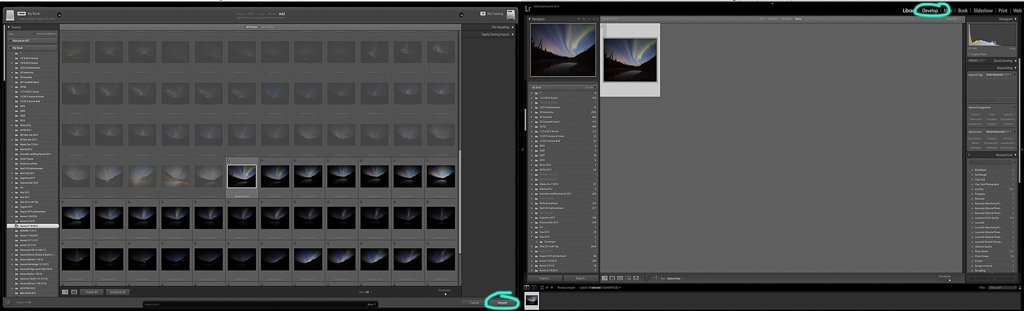
Step 1: Import Your RAW Files To Lightroom & Click Develop
Drag and drop your file into Lightroom, then click ‘Import’ in the lower right corner. After it has been imported select the Image and click the ‘Develop’ tab in the upper right. This is where you begin to edit northern lights photos.
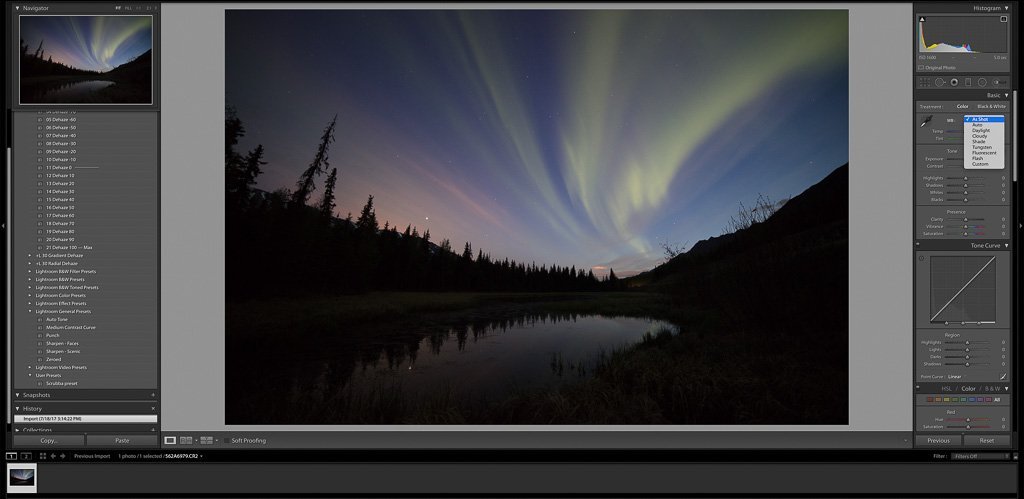
Step 2: Adjust White Balance
If you need to adjust your white balance click in the right toolbar under ‘Basic’ where it says ‘WB:’ and a drop-down menu appears. Play around and see what they look like. I find that I normally don’t mess with the white balance, but when I do I typically use Tungsten.
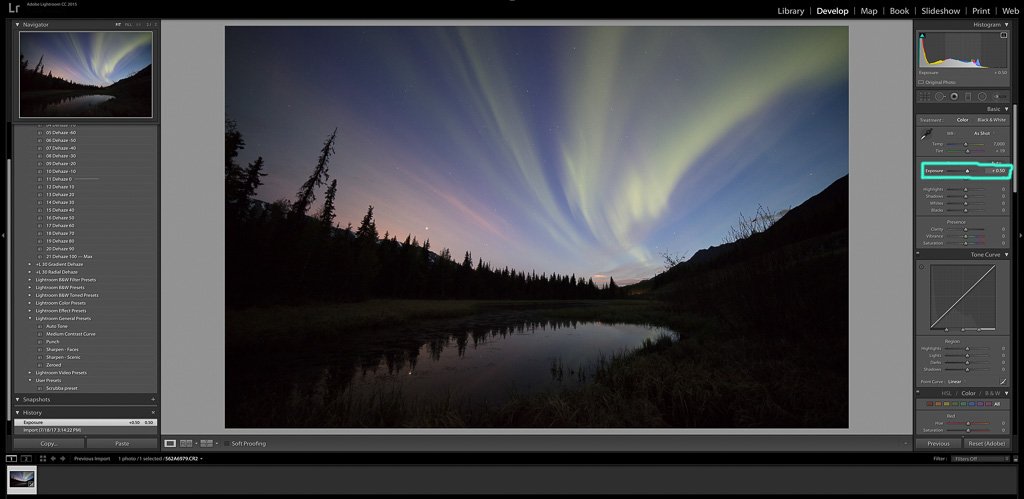
Step 3: Adjust Your Exposure
I habitually underexpose my photos slightly. I normally will need to increase my exposure a little in processing. Adjust the exposure until it looks as bright as you’d like. Be careful to not increase too much as it will blow out certain aspects of your photo.
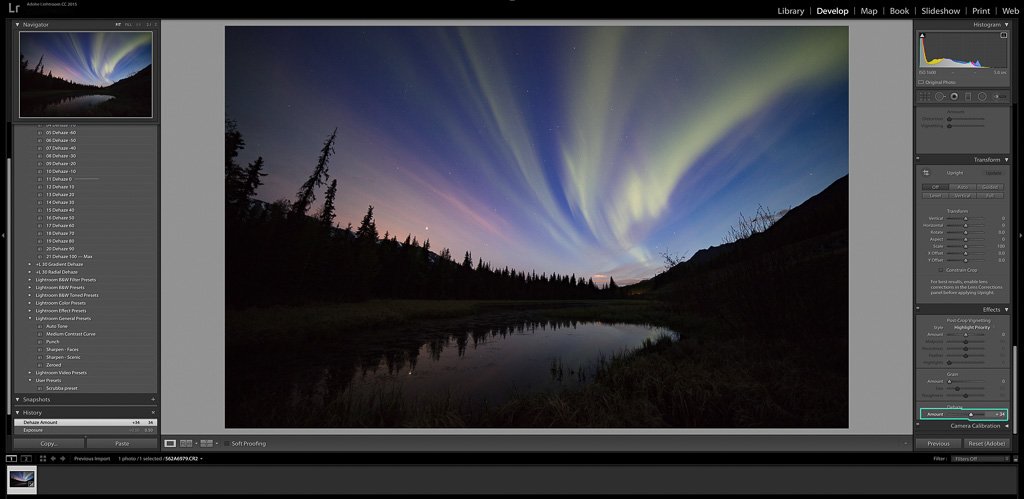
Step 4: Dehaze
Now scroll down to ‘Effects’ and move the ‘Dehaze’ slider up until it is to your liking. You may need to go and adjust the exposure again. Many times I’ll go back and increase the exposure a little more. Play around with it.
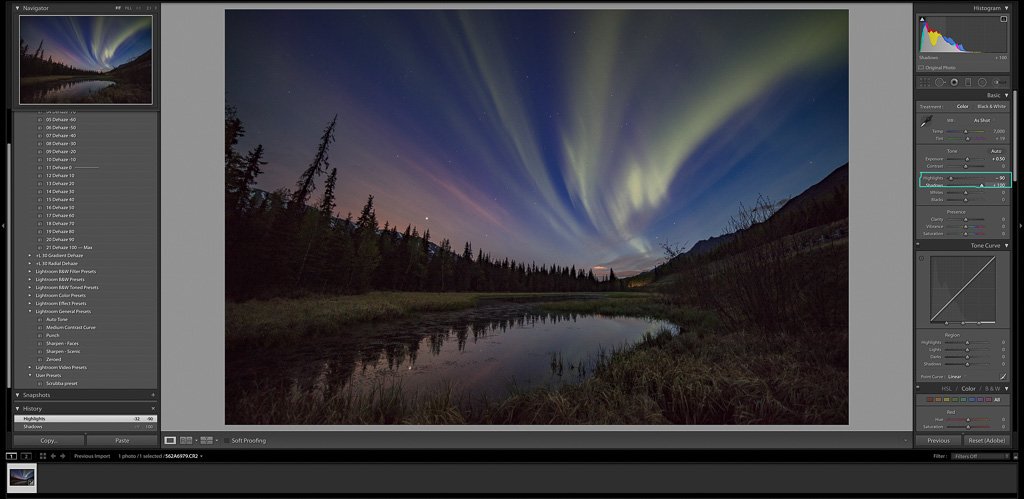
Step 5: Adjust Highlights & Shadows
I typically will bring my shadows up to lighten up my foreground and bring the highlights down a hair when I edit northern lights photos. Remember how dark the foreground was in the original photo? Bringing up the shadows brings out the foreground.
Of course, there may be situations where you want to bring shadows down if you want the foreground to have more of a silhouetted appearance. I usually will either leave the highlights alone or bring down slightly in a photo.
Step 6: Bring Up The Contrast
I personally don’t like too much contrast. Some people like it, other people overdo it in my opinion. Move the slider until you reach your desired effect. I usually don’t alter contrast in my photos.

Step 7: Adjust Blacks & Whites
Highlights and Shadows alter a much smaller range within a photo whereas black and whites are more dramatic. I normally leave the whites alone and bring the blacks up a little, but with that said this all depends on the photo. In some cases, I increase the blacks.

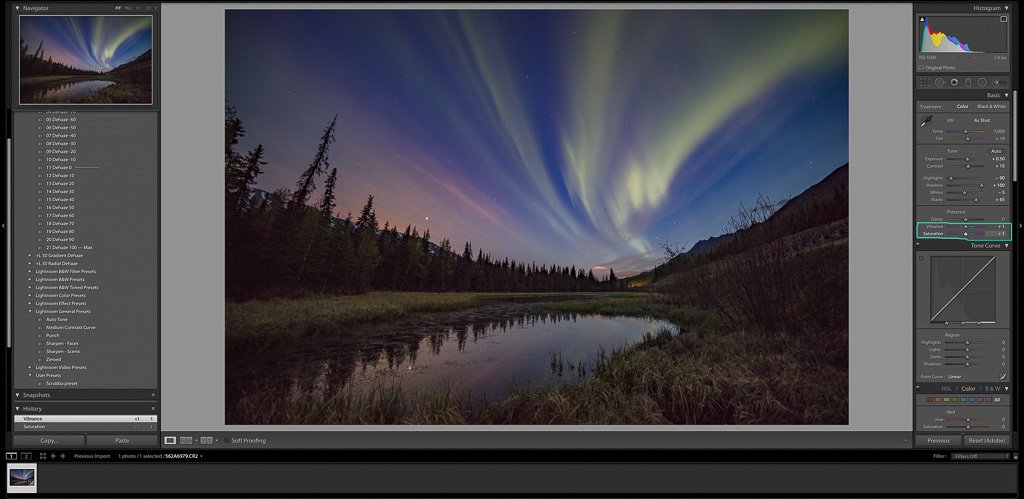
Step 8: Adjust Vibrance & Saturation
I find this to be better left alone or if you do adjust vibrance and saturation, only adjust it very minimally. I hate an aurora shot with obnoxiously bright colors (because it just looks fake). I prefer to adjust colors individually when I edit northern lights photos, which I will talk about in step 10.
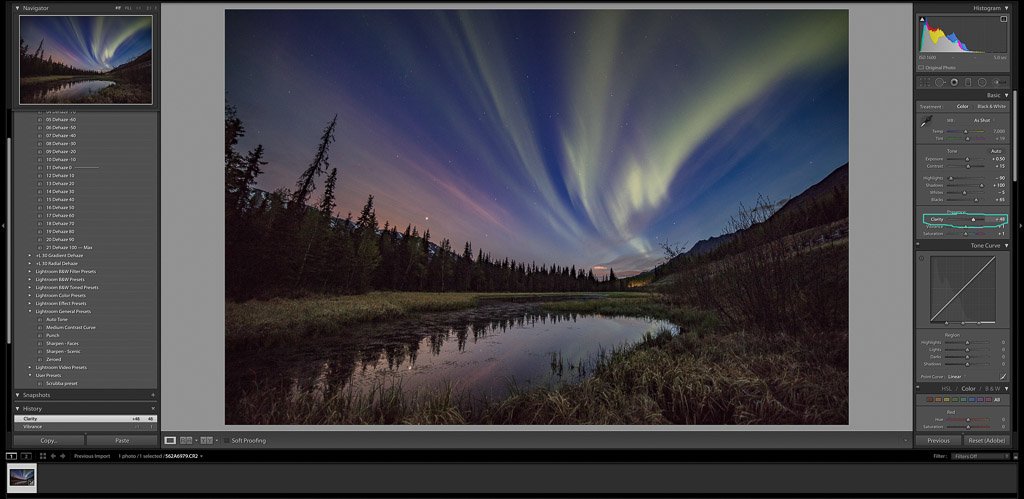
Step 9: Adjust The Clarity & Texture
I typically will bring the clarity and texture up to give the northern lights and my foreground a little more detail. Be careful how much you increase the clarity as it does increase the grain and too much texture can make it just look weird.
Step 10: Adjust Individual Colors
We’re finally leaving the ‘Basic” tab now and heading down to the ‘HSL/Color/B&W‘ tab. Make sure to click ‘color’.
More often than not, when you go to edit your northern lights photos you’ll be working with greens, as green is the most common color to see. For example, increasing the saturation for green will make only that color become more intense.
If you toggle the hue you can make them look more blue/green or more yellow/green. If you increase the luminance it brightens the greens up.
That’s the beauty of the ‘Color’ tab. You can isolate which colors you want to alter with little effect on other colors. You can do this to bring out any colors you want.
A word of warning: be careful with saturation. Move it to 100% and see what happens. It just doesn’t look right.

Step 11: Up Luminance & Turn Up Color Luminance
Now scroll down to the ‘Detail’ tab. I usually will up the ‘Luminance’ under noise reduction to about 20, give or take. I’ll then bring the ‘Color’ up to 100.
This will help smoothen things out and help combat noise when you edit northern lights photos.

Step 12: Enable Lens Profile Corrections
Now scroll down to ‘Lens Corrections’. Here you can check the box that says ‘Enable Lens Corrections’. This will correct any distortion from your lens.

Step 13: Selectively Edit With The Adjustment Brush
Now scroll back up to the top and select the adjustment brush. With this brush you can selectively edit parts of your photo.
First, I select the settings I want to alter. In this case, I’m going to increase the exposure of the northern lights to make them ‘pop’ in the photo.
Next, go down to the box below that says ‘Brush’. Here you can change the size of the brush if it’s feathered or not, and how intense it is. For hand painting details like this, I normally have my flow and density set at 30.
Step 14: Export, You Are Done!
The final step is to export! To export hit Command+Shift+E and the dialog box will pop up.
Select where you want it to export to, the image format (I use JPEG for web and TIF for printing), and change your color space to AdobeRGB (1998). Voila, you’re all finished! You now know how to edit northern lights photos.
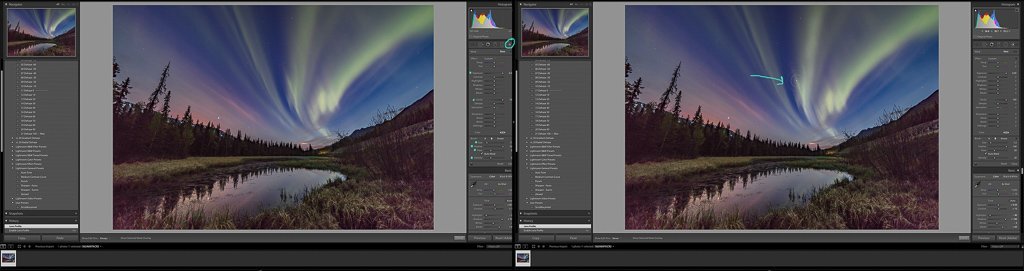
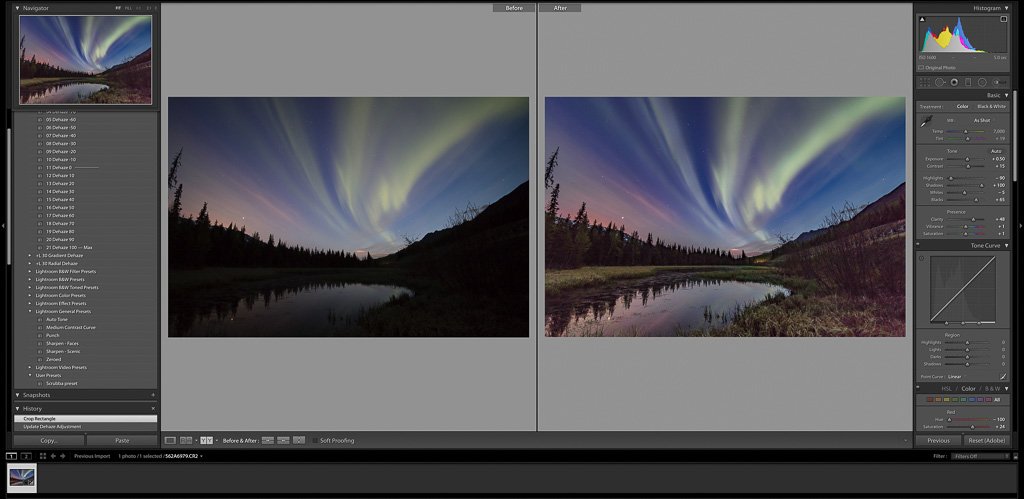
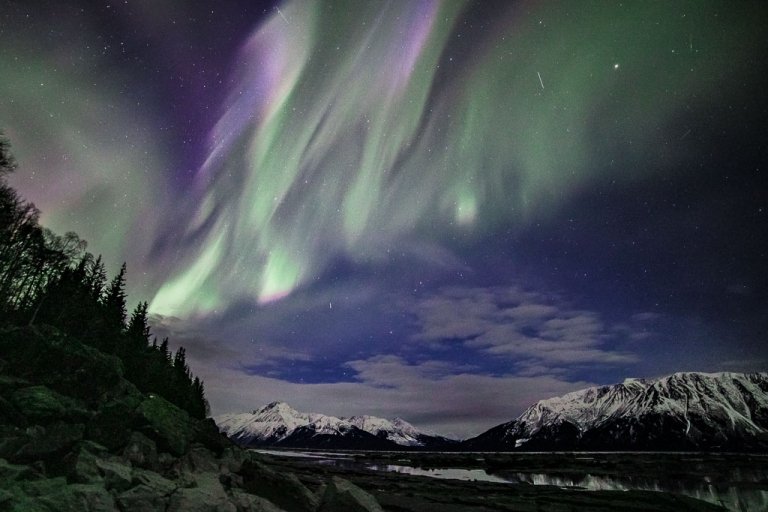
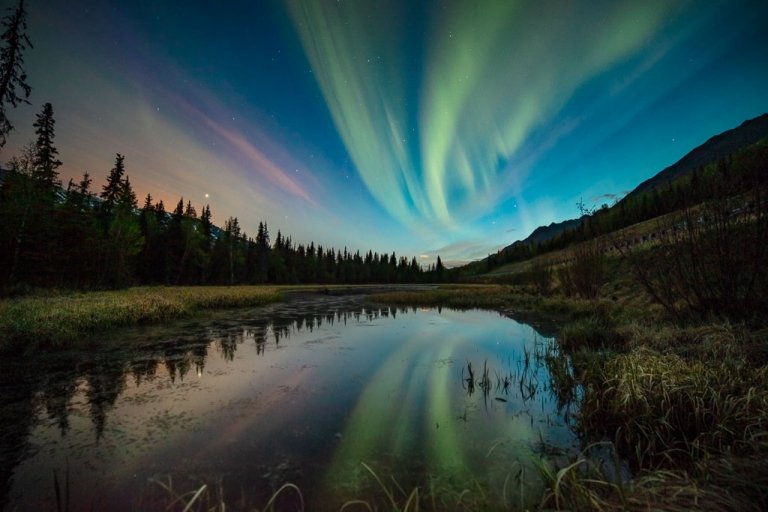
Before & After Editing The Aurora Photo
It’s always fun to see when you edit northern lights photos what they look like start to finish side by side.
I hope this post series helps you to get out there and shoot the aurora and edit your photos as well.
Happy Editing!
Remember, this is just a basic guide. You’ll find your own style and what you like as you progress with editing.
Have Any Questions About How To Edit Your Aurora Photos?
Ask your Northern Lights editing questions in the comments section below.
Check Out The Other Posts In The How To Shoot The Aurora Series
- What Is Aurora?
- What Camera Gear Should I Use To Photograph The Aurora?
- Camera Settings For Shooting The Aurora
Need Travel Insurance and Evacuation Services?
Start shopping for travel insurance plans over at IATI Insurance. Readers of the Adventures of Nicole get a 5% discount off your plan.
The Adventures of Nicole partners with Global Rescue to offer the world’s leading medical evacuation and security advisory services. To travel with peace of mind, shop evacuation coverage at Global Rescue.
Related Posts:
How To Edit Northern Lights Photos
10 Photos That Will Make You Book A Ticket To Bolivia
Aurora Photography Gear
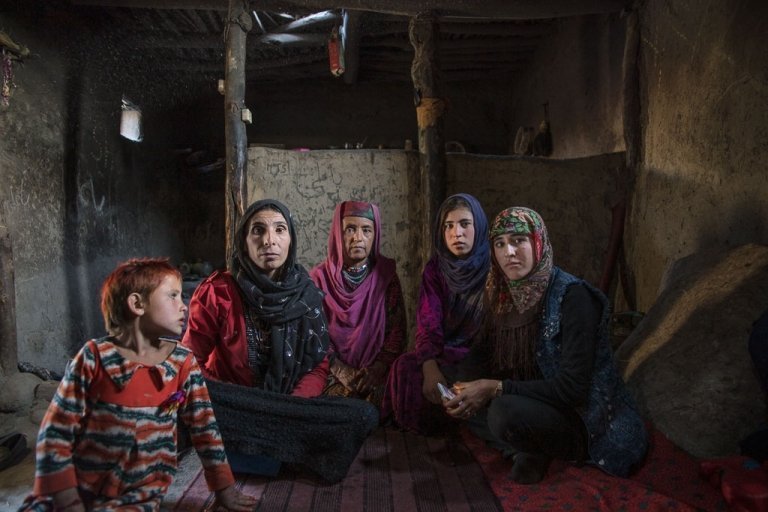
Photos From The Wakhan Corridor, Afghanistan
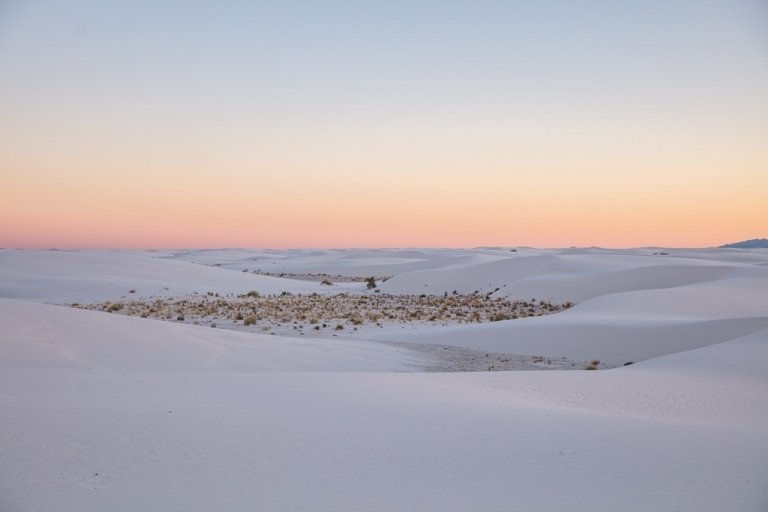
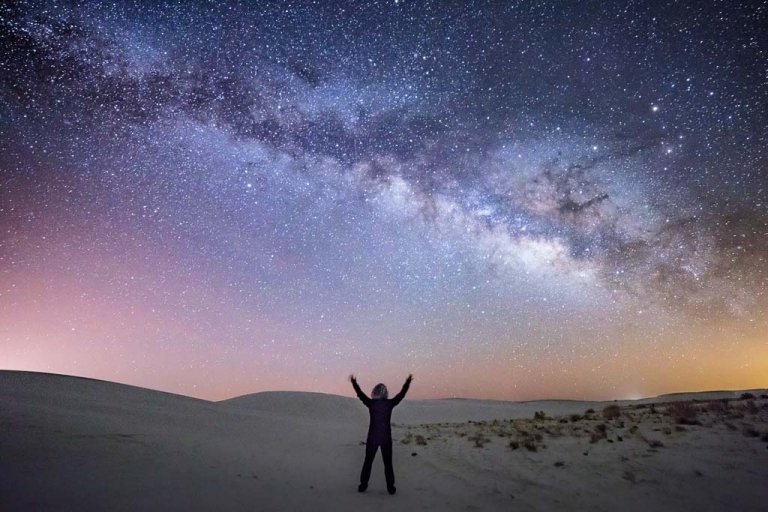
A Photographic Journey Through White Sands
The Best Places To See The Northern Lights in Alaska
9 Tips For Viewing The Aurora
How To Photograph The Aurora

12 Stunning Photos From Pakistan’s Gilgit Baltistan
How to Shoot The Stars
How To Shoot The Aurora: What Is Aurora?
My Travel Photography Gear
Thanks for the tutorial! It was really helpfull! Your photos are beautiful 🙂
Aww thank you!! Happy to hear it helped you out
Thanks for this informative article! I’ve just started learning to take pictures of the northern lights this winter as I just moved to Yellowknife, Canada.
Hi Vaughn,
Hope you caught some good aurora shows over there this winter!