Aurora Photography Gear
Updated February 2024, How to Shoot the Aurora: Aurora Photography Gear was originally written in July 2017
This is part two of a four-part series where I explain what is aurora, what gear you need to capture the aurora, how to shoot it, and how to edit your aurora photos. Traveling to see the northern (or southern) lights is a big bucketlister to check off in polar destinations like Alaska, Antarctica, Finland, Greenland, and more! Want to take an aurora trip? This guide will give you all the information you need!
Are you planning a trip to the high latitudes (or super low lats)? This guide series will give you all the tips, tricks and a step-by-step list of how to shoot the aurora on you’re very own.
Want to catch up on the first part of this ‘How to Shoot the Aurora‘ series? Check out ‘What is Aurora?‘.
What Do I Need To Bring? Aurora Photography Gear
This guide includes all the aurora photography gear that you need to capture the dancing northern lights. I’ll recommend some items and share what I use, and I’ll even throw in some bonuses about what outdoor gear is handy!
First Things First: A Good Camera
You can’t capture the aurora without a camera! This is step one to the northern lights photography gear guide. The following will be a checklist of what to look for in a camera:
A Camera With Manual Settings & High ISO Capability
Think you need a big, bulky, expensive DSLR camera to capture the aurora? Think again!
While a DSLR camera is going to have better capabilities and a full-frame DSLR is going to yield the best quality of images, they aren’t necessary for a hobbyist just looking to capture some great travel photos. Your camera will need to have high ISO capabilities as well, allowing more light to enter into the sensor.
A Wide Angle & Wide Aperture Lens
Aperture is the aspect of the camera that allows light into the camera, think of it like the pupil of your eye. The lower the number, the wider the pupil is.
I shoot with a lens with an aperture of f/2.4. There are lenses out there with as low as f/1.4. A lens with an f/4 or lower is going to yield the best results when shooting the aurora.
You’ll also want your lens to be wide-angle, meaning 24mm or wider. I find I prefer a 14mm lens for shooting the northern lights, but you may find you like something not as wide.
Cameras & Lenses I Recommend
Right now I shoot all my night scenes with a Canon 5DS-R and a Rokinon 14mm f/2.8 SP prime lens. No matter what camera brand you use, if you use a DSLR I highly recommend Rokinon’s lenses.
They’re super sharp, wide, and not so rough on your wallet. Rokinon makes prime lenses in 12mm, 14mm, 24mm, and 35mm.
But not to worry, you don’t need to spend a fortune to buy a good enough camera to capture the northern lights. Before upgrading to the 5DS-R, I shot with a 600D/Rebel-T3i and the Canon 10-22mm EF-S lens. This is a great combo for someone who is starting out, all the way to relatively experienced photographers.
The kit lens- Canon 18-55mm EF-S lens that comes with the Canon Rebel camera body series at purchase is a great lens to capture the aurora on as well.
Prior to my DSLR days, I shot with a Canon Powershot which is a point-and-shoot that is fully capable of going into manual modes and shooting the aurora.
Want DSLR quality without the weight? Try out the mirrorless cameras out there by Canon, Nikon, and Sony.
The Next Most Important Piece Of Aurora Photography Gear: A Tripod
Photos of any nighttime scene whether it be the aurora, the milky way, a nighttime cityscape, etc. this is all a wasted effort unless you have a tripod. One thing: camera shake.
When you are shooting these photos, which I will explain in the next post in this series, you will be leaving the shutter open on the camera for an extended period to allow enough light in to capture the northern lights. This means the camera is recording the image over an extended period, so any movement will cause the image to blur.
If you are in an absolute pinch and get out to your shooting site and have forgotten your tripod you could fashion a makeshift tripod to hold your camera still. Yes- I have unfortunately been in this debacle. Look around, see if there are any rocks or items lying around you could prop your camera up with. I’ve used my backpack before in some cases.
How To Select A Tripod
This is important. You don’t want to purchase a flimsy tripod for a heavy camera. Look at what your camera + lens and any other trinkets that will be attached weigh and figure that in when choosing your tripod.
Tripods I recommend
The MeFoto Globetrotter is a great middle-of-the-road tripod. It does get heavy if you hike out into the backcountry to take photos though. It is beefy and strong, which is an important thing for DSLR owners.
The Joby Gorillapod Focus is the tripod I am now traveling with. Joby’s Gorillapod line is pretty awesome, you can bend and twist the legs to just about any shape you want. And not to worry, Joby makes the Gorillapod in just about every size from iPhone to point and shoot to heavy-duty DSLR.
The only downside to the Gorillapod to a traditional tripod is that you cannot adjust the height. But it comes in at just over 1 pound in weight for the Gorillapod Focus and less for smaller models, making it a great option for travelers.
Fully Charged Batteries & SD Card
It tends to be quite cold out when you are out shooting the aurora. Make sure your batteries are charged as they tend to drain quicker in the cold. It’s also not a bad idea to have a few spares on hand.
And yes, I did mention the SD card. Why? Well, you can’t record images if you have no SD card, it’s the equivalent of not bringing film. If you shoot on film still, bring film!
Optional Aurora Photography Gear
While these are all optional, some will make your life a whole hell of a lot easier while you’re shooting.
Shutter Release
Using a shutter release reduces camera shake. Rather than clicking your shutter to take an image, you click a button on a remote and take the photo without touching the camera itself. Some have corded remotes and others are wireless.
If using one with a wire I recommend getting some peel & stick velcro to secure hanging wires and remote to the tripod because the slightest breeze will shake the wires and therefore, shake the camera. Wireless is the way to go, although a little more expensive in most cases.
If you don’t have a shutter release, not to fear. You can set the 10 second timer on your camera to reduce shake.
Battery Grip
A battery grip will give you more juice in the cold. They are especially handy if you’re planning to shoot time-lapse images throughout the night. Each battery grip holds two batteries and attaches to the bottom of your camera.
Downside? They get heavy.
Headlamp Or Torch/Flashlight
You need to be able to see in the dark, especially as you’ll be fumbling with camera settings in the dark.
What Else To Pack
Recommended aurora photography gear for staying warm!
- Jacket– look at the forecasted temps for where you are going. You may only need a light jacket or you may need a parka suitable for sub-zero temperatures! Remember, layers are your friend.
- Gloves– Your hands may get chilly out there. I will bring thin to heavy wool or skiing gloves with me depending on the conditions.
- Hat– Most of your body heat leaves from your head.
- Snowpants– If you’re going to be shooting in very cold climates get some insulated pants and remember you can always layer up underneath.
- Hiking boots or muck boots– You can wear lighter shoes if it will be warm. My go-to are my trusty insulated muck boots. My feet stay plenty warm and if I need to go stand in open water for that perfect reflection shot, they got me covered.
Have Any Aurora Photography Gear Questions?
Ask in the comments section below.
Check Out The Other Posts In The How To Shoot The Aurora Series
What Camera Gear Should I Use To Photograph The Aurora?
Camera Settings For Shooting The Aurora
How To Edit Your Aurora Photos
Need Travel Insurance and Evacuation Services?
Start shopping for travel insurance plans over at IATI Insurance. Readers of the Adventures of Nicole get a 5% discount off your plan.
The Adventures of Nicole partners with Global Rescue to offer the world’s leading medical evacuation and security advisory services. To travel with peace of mind, shop evacuation coverage at Global Rescue.
Related Posts:
How To Edit Northern Lights Photos
10 Photos That Will Make You Book A Ticket To Bolivia
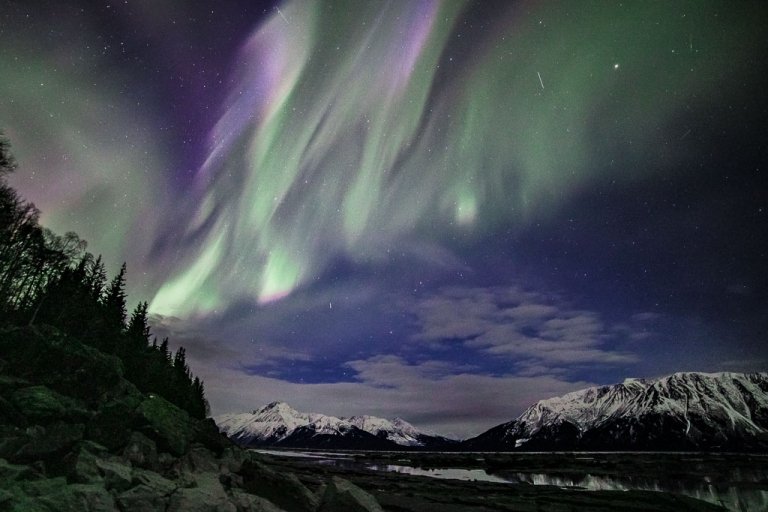
Aurora Photography Gear
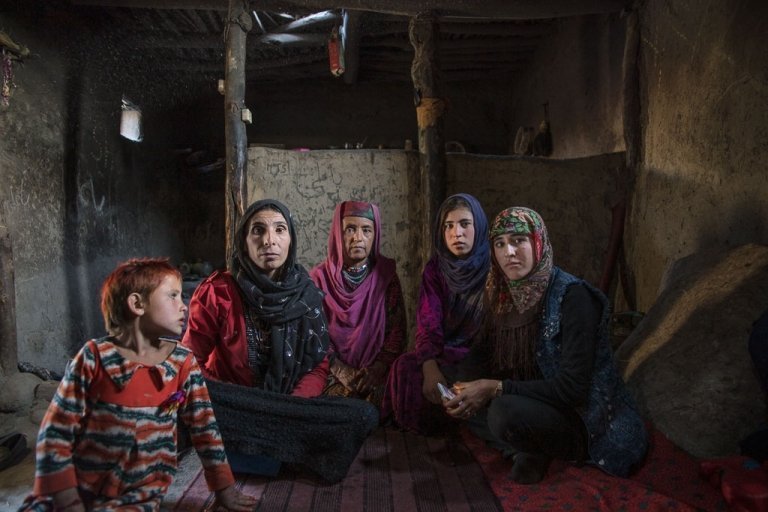
Photos From The Wakhan Corridor, Afghanistan
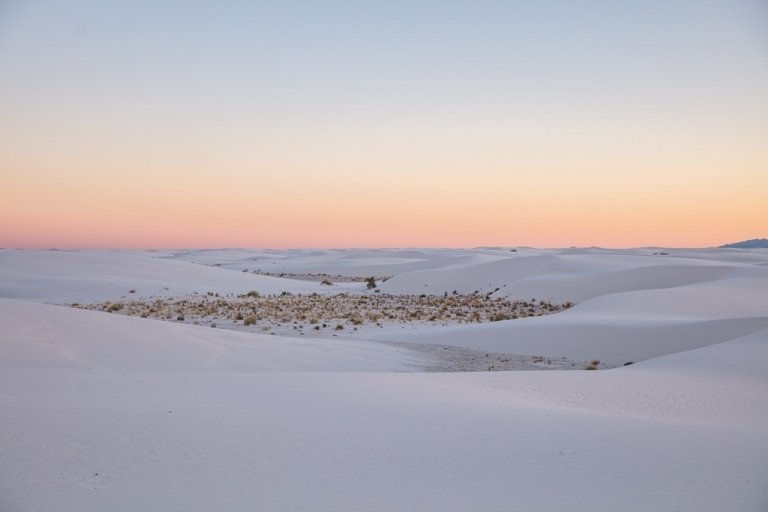
A Photographic Journey Through White Sands
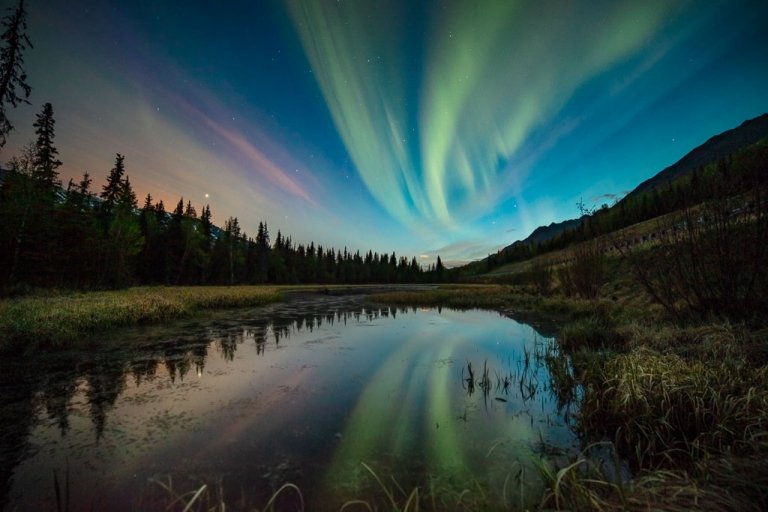
The Best Places To See The Northern Lights in Alaska

9 Tips For Viewing The Aurora
How To Photograph The Aurora

12 Stunning Photos From Pakistan’s Gilgit Baltistan
How to Shoot The Stars
How To Shoot The Aurora: What Is Aurora?
My Travel Photography Gear